 |
| A typical summer's day in Scotland |
Is it just me, or is anyone else a total slow coach at sewing? I've just this minute finished my first Emery dress (which is only my second ever woven dress) and it has taken me approximately 3 full days (say, for instance, that a full day counts as 7 hours continuous activity). At time of writing I'm too tired to even put make-up on and get a photo of the dress on me (but in true
Mr Benn fashion, as if by magic, here I am in the dress now).
 |
| Sorry about the location, background objects, shoes, focus...look i'm just sorry for everything OKAY |
What to say about my experience of this very popular pattern? The style is right up my penny lane, being a lover of 50s/60s fashions. I had worried that the gathered skirt would make my hips, arse, and tummy look even bigger than they are in my head, but I actually feel nice in the silhouette.
 |
| Image from Christine Haynes' shop |
Sizing wise, I used the pattern size 14 for the bodice and cap sleeves, and graded out to the 18 for the waist. Learning as I have recently that I should be choosing sizing according to my high bust (which is 38"), I should have cut a 12 in the bodice and then done an FBA, but having read a few other people's experiences of this dress, I cut the 14 based on my actual boob measurement (41") and I'm quite pleased with the fit.
 |
| The wind was starting to get up and the patio umbrella had just blown over but look at me not caring one jot |
Some great advice I learned at last year's
dressmaking course was to always measure pattern pieces, and not just go by the measurements listed on the pattern envelope. I'm glad I did, because based on my waist measurement (38"), the pattern envelope lists finished measurements for size 16 as 39 1/2 inches. After measuring the pattern pieces (taking into account darts, and seam allowances), the waist for a size 16 would only be 36 6/8 inches. Size 18 pattern pieces measured to 38 6/8. I decreased the seam allowances to 3/8 when sewing and the waist is just right on me in the finished dress.
 |
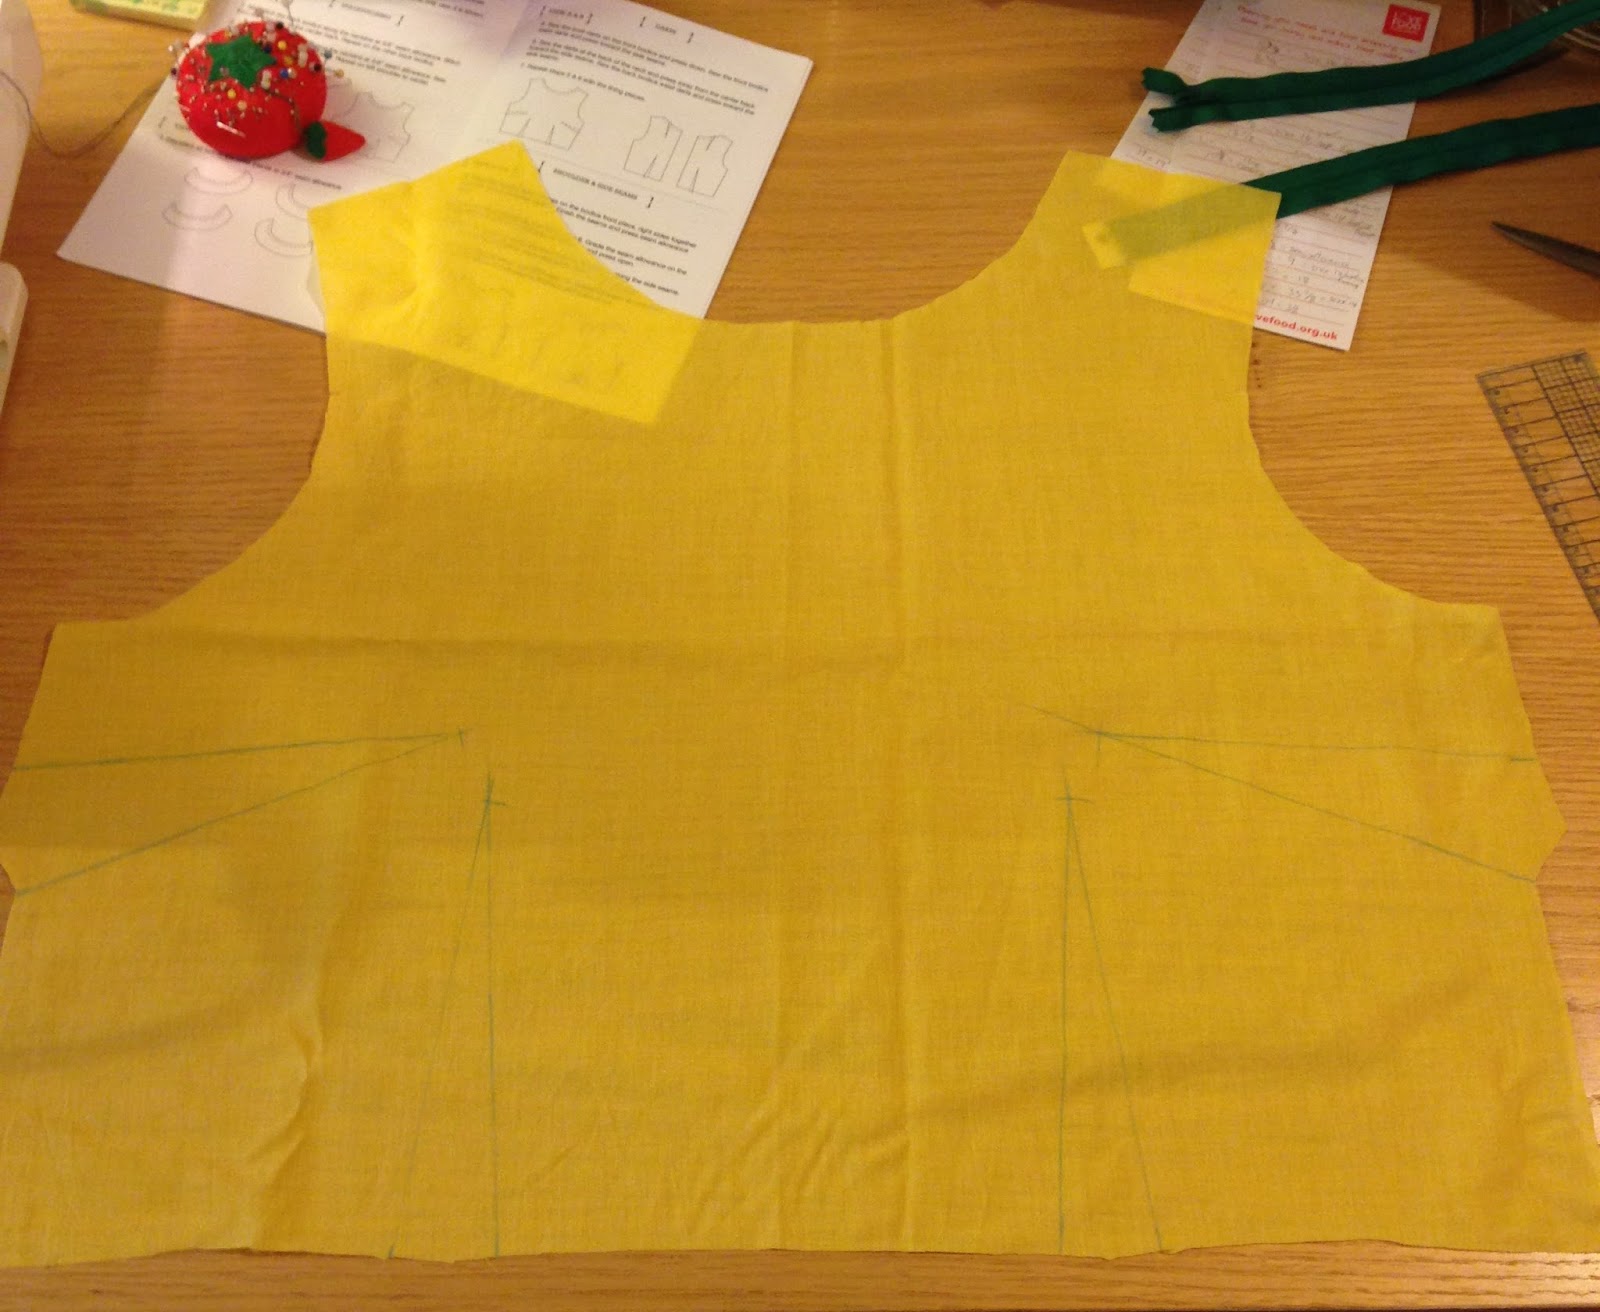
| Pre neck, sleeves, and skirt hems |
Although I needed an 18 for the bodice waist, I knew that the hips were going to be full of ease, so I boldly cut a 14 in the skirt. My thinking on this was to reduce the amount of gathers so there wouldn't be a party going on round my waist. I think this worked well and feel like my gathered skirt looks less bulky round the waist than others I have seen. Having measured the pattern pieces for the 16 (when I was thinking of using that size) I worked out the total width of the ungathered skirt waist would have been 64 1/2 inches. I'm actually wondering now how much smaller I could go with the skirt...I have only ever sewed up one other skirt and that was a full circle skirt for the Sew Over It Betty dress (still unfinished!), so I'm not greatly knowledgeable about sewing skirts, although I'm already preferring a gathered to a full circle.
Fabric was 3m of quilting cotton from my local shop The Cloth Castle in Victoria, Canada (which I brought with me to Scotland, together with the Emery pattern). The fabric cost $10 a metre and I got it last year I think. Now there's me thinking that $10 is breaking the bank...but since being home and using a roughly $2 to £1 conversion...5 quid a metre is a bloody bargain, naw? It's quite soft but not thin, and says it's made in Japan no less (it also says Sevenberry on the selvedge so I guess that's the fabric manufacturer). Anyway, I'd been saving it for a toile because let's face it, I can always get this print quite easily again should I want to.
 |
| Cutting out the last piece with inches to spare...or so I thought. Foiled again! |
I was oh-so-pleased with masel when I cut out the final piece of the pattern with about half a dozen inches of fabric left (this was cutting the short sleeve version, sans bow and sans collar). Jammy big smile on my face, so I had. Only to realise shortly after that I had forgotten to cut the front bodice lining!! The only thing I had to hand was a very thin, but soft, bright yellow cotton that I'd used to underline an eyelet woven tee top I made since I've been home. I was in no mood to make a trip up to Glasgow (£6 train fare!) just to buy some lining fabric in the right colour, which would cost less than the train. So using the bright yellow cotton it was!
 |
| Bright yellow bodice lining - file under 'what was I thinking' |
I really wanted to follow the pattern to the letter, I basted when it said baste, I pressed when it said press, I finished the seams when it said...you get the idea. So although I had read plenty of reviews of the Emery which didn't have lined bodices (bodii?), I really wanted to toe the line on this one. I bravely marked up the 16 darts which would be sewed up on the bodice and lining. I even sewed every one of them buggers (and actually, what good practice!!! I feel quite a bit more confident with darts now). Then...I decided to forego the lining after all. Despite the baltic temperatures of this year's Scottish summer (seriously, I'm too numb to even complain anymore), I seem to get hot very easily lately so thought I would rather have an unlined bodice and more air circulating round my body than have the dress look nice on the inside.
 |
| My lovely neckline all puckered after folding over the bias binding twice |
Using Christine Haynes' (who designed the Emery pattern) helpful
sew along posts, she'd offered many options to key design parts in sewing up the dress, one being omitting the lined bodice and using bias binding at the neck instead. I even had matching binding left over from the eyelet woven tee (which I'd also bound at the neckline). Now, following
Christine's instructions, I folded the binding over twice before finally sewing to the neckline. However, it puckered my entire neckline! So I unpicked it all and then just folded the binding once (so the binding is visible inside the dress). This left dirty great holes in my dress, maybe my sewing machine needle is too big? I've tried steaming the area where the unpicked stitches were and the holes have closed a little, but not fully. This to be remedied!
 |
| The holes are the stitches where I had originally folded the neckline over the binding twice |
The overall fit has turned out pretty good, except that my torso is obviously a bit shorter than the pattern, so I'll need to shorten the pattern piece next time (probably by an inch). Having already sewn the skirt onto the bodice, I thought I would try the lazy-gals-guide-to-fit and hoiked up the shooders of the dress and sewed another inch past the seam allowance on the shoulders. This helped the dress hit my waist perfectly, but my boob darts became too high and the fit on my arms became tighter (which it hadn't been). So I unpicked that angry inch and left a half inch plus the original seam allowance of 5/8. As I say, I'll shorten the torso pattern piece next time. For the moment, I can live with the way it is on this dress, although I have a bit of ruched up fabric on my back but how often is that going to be so visible as to annoy me? Out of sight, out of mind, dear readers.
 |
| The wind caught my skirt and made it all poufy. I'm so pleased with that hem! |
The final step in finishing the dress was to hand-stitch the skirt hem, and again I followed the instructions exactly, and I'm so glad I did. It turned out as damn near exquisite as you can get on your first go. I used the
Craftsy tutorial which Christine Haynes had written on this sewing technique, and I really took my time (managing to catch a single thread of the fabric for the majority of stitches. I hope this will be strong enough, or will it break?). I used the half inch turn-up, followed by another 11/2 inch turn up as recommended, and, with a full 2 inches off the bottom of the skirt, it hits the bottom of my chubby wee knees just how I would like it to.
 |
| Unlined and loving it |
Best thing about the dress? The pockets! Cliches are cliches cos they are true!
 |
| Couldn't get a close match on the zip colour but who cares! And I cut away bits at the top of the zip when I had folded the neckline over the bias, which I then unpicked and now the top of the zip is a bit of a mess. Again, am I bovvered? |
I'd been wanting to try the Emery for a long, long time and now pleased that I've completed it and that I like it and actually feel nice in it. It's a very wearable retro-style dress, with lots of opportunity to customise and sew up with different fabrics. Look at this
brilliant tartan one!
 |
| I paid £1.25 for each of these in the end, plus two vintage bridal patterns, from a lovely man's antique shop in Ruthven Mews up the west end of Glasgow |
So, that's the Emery off the list. Next up is either grading one of the vintage patterns I bought last week, or the Sewaholic Cambie pattern (which I also brought with me). I've a 60s night coming up, so veering towards the vintage Simplicity one, especially as I have a Craftsy class in grading to watch. I also have fabric in mind, which I bought at the Cotton Print Factory Shop last week, and I've already purchased a co-ordinating zip. Sorry Cambie, you're next on my dance card though!
 |
| Really looking forward to this night at The Renfrew Ferry, it's gonnae be a gas, gas, gas! |
Costs:
- 3m fabric from the Cloth Castle, Victoria, BC=$30CAD (£15)
- 22" invisible zip from Remnant Kings=£1.50
- navy and white cotton threads from Remnant Kings=20p (I think I was mischarged!)
- navy double fold bias binding from Remnant Kings=bought for a previous project
- yellow cotton lining from Remnant Kings=bought for a previous project
- Emery Dress pattern from The Makehouse, Victoria=$24.64CAD (£12.32)
Grand total of £29.02 for this dress.


What a lovely dress. I have ogled the Emery from afar for a long time . It really is fabulous made up. Xx
ReplyDeleteWhy, thank you! I am back in Scotland, having left my Emery pattern in Canada. But not yet frustrated enough to print it out here (as I have the PDF version as well). Hope you get a chance to sew it up someday! xx
Delete