A place where a wee Scot can talk about the stuff she bores other folk with. Sewing, The Beatles, cats, and zumba may feature...

Sunday 5 February 2017

Toaster Sweater 1: fitting review

Before I sew anything (still considering myself a beginner to dressmaking) I research a pattern extensively.  This goes on for days (actually more like weeks and months) before I take the plunge and cut. I am looking for two things: fabric choices (including type of fabric and use of colour/prints/textures) and fitting reviews. Neither are entirely necessary: it's just how I like to warm up for the main event.
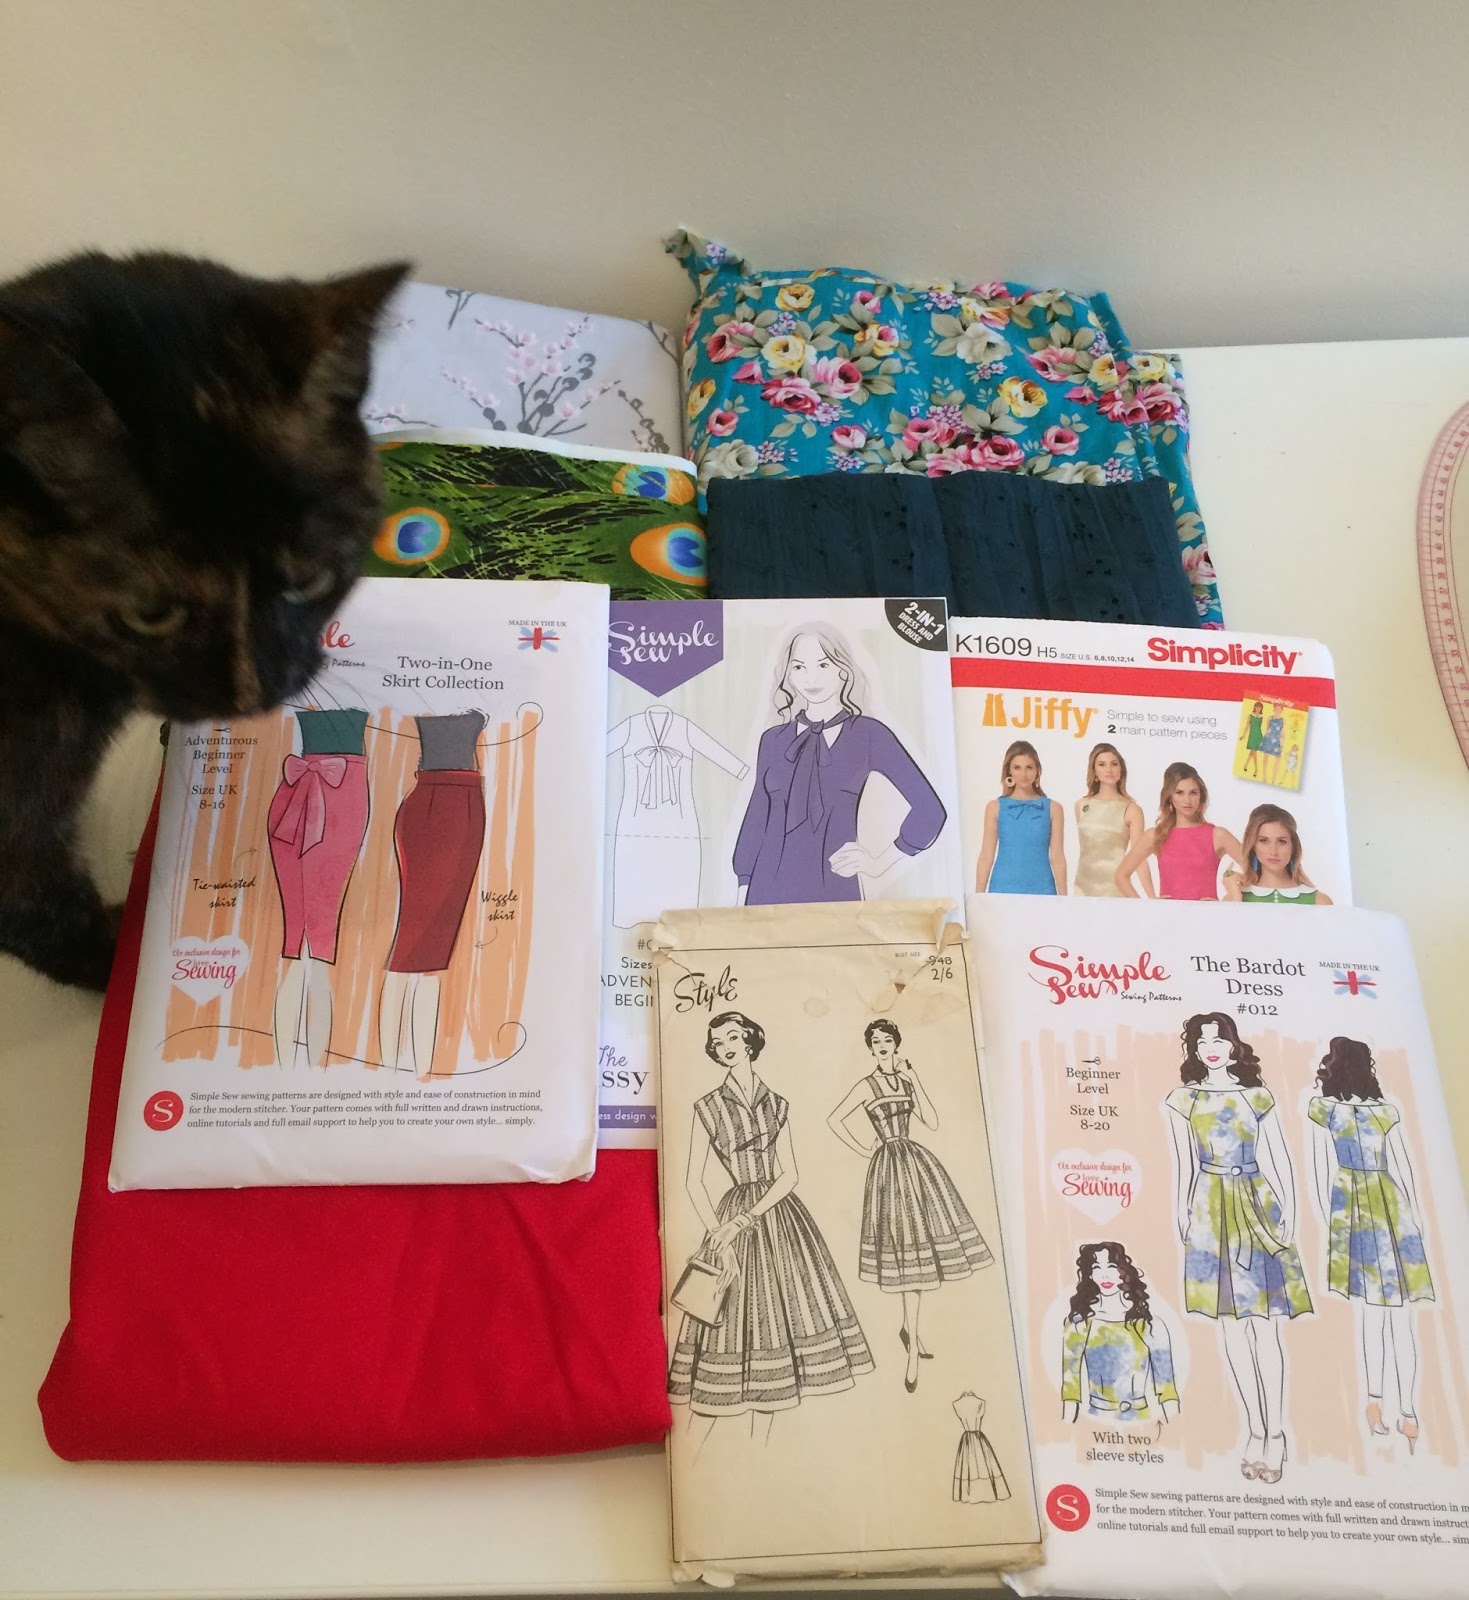
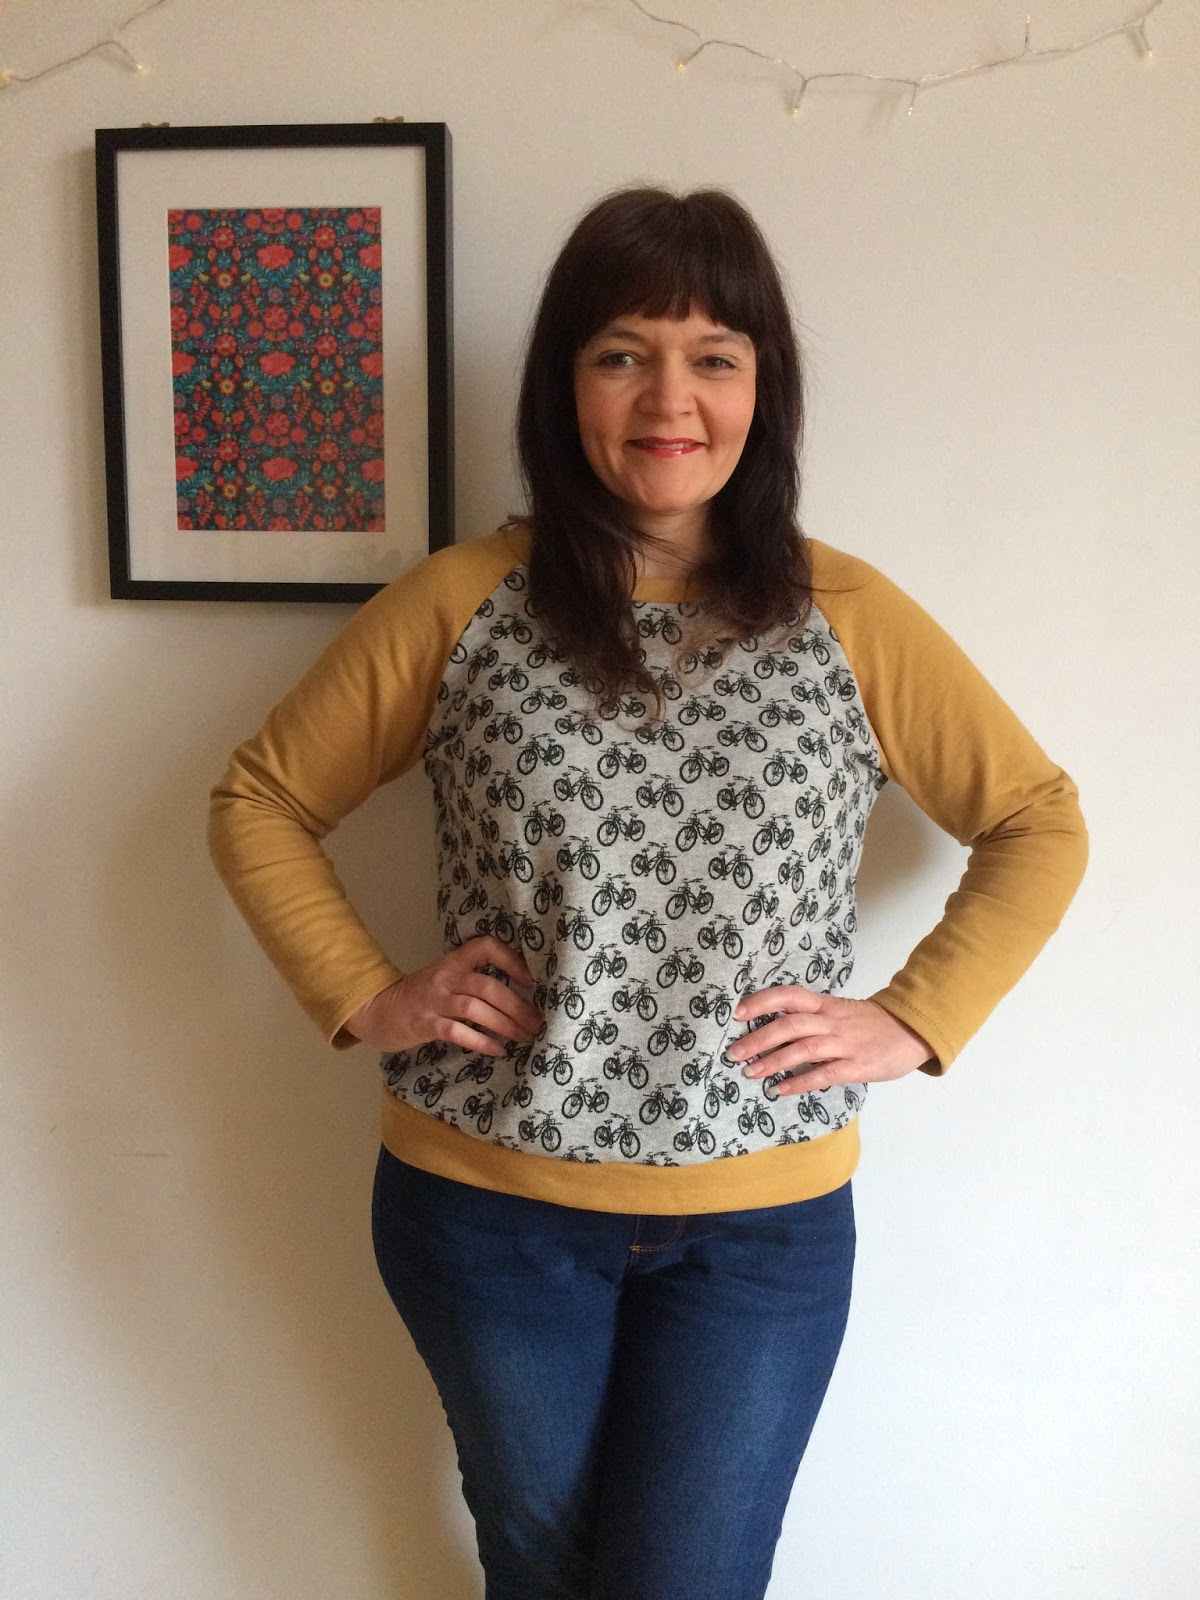
The Toaster Sweater 1 from Sew House Seven

For my first try of the Toaster Sweater 1 (following on from having started, but not finished, Toaster Sweater 2 a fortnight ago), I was still undecided on whether to use a more flimsy, drapey sweatshirt or jersey, or a more sturdy one (and had even been contemplating a foray into scuba, which I've never used before - I have a strange relationship with it, whenever I see it online I make heart eyes but whenever I get the chance to actually touch and feel it in a shop I recoil in horror). 
I was veering towards sturdy because I really wanted to have the look of the neck band standing up, rather than being floppy (just personal preference). I have a couple of French terry and fleece sweatshirt fabrics in my stash, and yesterday I bit the bullet and plumped for this sapphire blue fleece-backed sweatshirt (now sold out) which I purchased from Fabworks in December as part of my xmas gift-making project. I had intended to use it for a sweatshirt for my dad but in the end I only used it for sleeves for the Seamwork Paxson I made him (because I was trying to be a clever clogs and make a contrasting body/sleeve/cuff combo). Having seen how beautfiul my Toaster has turned out, I wish I had used the entire fabric for dad's. Sorry dad!).

As for fitting, I had seen pics online where the arms were fairly long and reviews reflecting same, and also that people had different preferences for the bodice length. Preparing for this, I took my Linden (which I hate the neckline on...but will be adjusting that soon since reading A Closetful of Posies's solution of adding 2cm on all the pattern pieces which fit to make the neck) and used that as a block to compare to the Toaster 1.
I've put on 8-9lbs (arrrrghhh! - I did go back to Slimming World yesterday though, so...) over December and January so my current measurements are: bust 37/waist 33/hips 42.5.  Going by the pattern measurements guide that would put me as Large and grading out to XL at waist and hips. I eventually cut a Medium and graded out to between L and XL at the hips/waistband...and I cut a Medium in the sleeve, graded to an XS! (what a thrill to cut anything in an XS, lemmetellya folks).

I have a pathological fear/hatred of making anything which is super baggy on my shoulders and boobs, as it just makes me look even bulkier than I already feel (#issues).  It's also cos patterns tend to grade everything up as it moves from the smallest size to the largest. For example on the Toaster 1, the Bottom Band increases depth the more sizes it goes up. Why oh why??? Why would someone cutting the XXL band need it to be deeper than someone cutting the XS one, if both people are the same height and therefore the same proportion of the band suits them both. Maybe if you are tall you might want a deeper band to suit the proportions of your body, but unless anyone can explain to me why the hemband needs to increase its depth for someone who is 5 feet and 16 stone versus someone who is 5 feet and 8 stone, then my rage abides. I cut my Bottom Band with a length of between L and XL and a depth of a Medium.
I was most surprised at the width of the sleeves and even though by placing my Linden sleeve pattern piece it was showing me in black and white that the XS sleeve would fit me okay, I was terrified that I was suffering from delusions (Extra Small, me? Really?). However, in the end, the sleeve fit me perfectly, just as the Linden does (I cut a size 6 in the Linden sleeves). Again this adjustment is a personal choice, as I just don't like the look of an overly baggy sleeve. I also shortened the sleeve, and got it almost perfect, but had to sew a seam allowance of 1" when joining the cuff to the sleeve to give me the length that I really wanted. (incidentally I sewed up the rest of the garment with a seam allowance of 4/8", contrary to the pattern's instructions which allow for 5/8").

It took me 5 hours of working on the paper pieces alone yesterday but having been heartened by all those comments I've seen online ('quick make...only takes an hour to sew') I was all geed up to finish the actual sewing in time for Let It Shine. In the end I only caught the last half hour of The Voice. (#firstworldproblems) It took me just over 2 hours to sew this. Am I getting faster the more garments I make? It doesn't feel like it! I am getting more and more fussy about fitting adjustments so am still taking 1-2 days to complete any item. I'd love to be able to crank out a new dress of an evening, or a t-shirt top in the space of Corrie advert breaks but i'm not there yet. Still hoping though!

I love my finished Toaster though, everything is just how I want it. No more drafty necks or wrists, and because I still see myself as looking like a Michelin Man in it because it's made from a thick sweatshirt fleece, I will probably only wear it in the house...but it means I can probably save on heating bills as it's so nice and toasty (hahaha the penny has only just dropped as to why it's called the Toaster! God, I'm slow). There is a very slight blouson effect between the bodice and bottom band...must have been my drafting adjustment. There's not much room to wear anything else under it as this baby is snug! But that's also what I wanted.

Oh and I was too feart to attempt the top-stitching, mostly because I was trying to sew it within an hour, but also because I only have two choices of stitch on my machine (straight and zig-zag) and I wasn't sure how twin-needled zig-zag would look (I was so aware of the time, I didn't even want to change needles to try!). I'm still putting off trying to sort the thread-breaking issue on my serger, so I again just used my sewing machine for this garment. There were some really bulky parts (the cuff joining and hemband joining) which I had anticipated would finish both sewer and machine off, but we made it!
Please ignore the bulk at the cuff - I've yet to trim out the excess

As many people have noted, the bottom band is cut as one continuous length, and depending on the width of your fabric this will be just about selvedge to selvedge. This didn't present a problem for me but what I don't like is that one side of the sweatshirt has a seam running from underarm to bottom of hemband but the other side of my bod has a seam running from underarm and stopping at the waist before the start of the hemband. There's a lack of symmetry that is niggling away at me and I don't like the finished look of it. So next time I'll just draft the hemband as two halves and join them together (constructed the way the Linden is).
Snuggle-meister

I love my sticky-up neckband, if I were to use a french terry I think it'd interface it so I got the same erectness (insert your own snigger here). All in all, a successful make, very functional, and I'm making another one soon (as a gift). Don't know if I would make another for myself....there's other sweatshirt patterns I want to try (Paprika Pattern's Jasper - which I've had since it came out, Blue Print Pattern's Geodesic and Pattydoo's Freestyle Nelly hoodie) and how many sweatshirts do I need!
Paprika Patterns Jasper

Blueprints Geodesic

Pattydoo Freestyle Nelly hoodie/

In other news: December and January round-up


Here's a quick round-up of what I've made in the past few months but didn't get round to blogging:

This was the first christmas that I have attempted to make all my gifts. I took some basic measurements but no-one knew what they were getting so that it would be a surprise. Read on for the deets (pics ain't great as I snapped what I could during all the festive hilarity):
Must have spent an hour trying out all variations of print placement...just to avoid any anatomical faux pas!
Quite pleased with the binding on the neckline. Yasss mama!
Gag on her eleganza, hunties!
McCall's M6886 (view D with full length sleeves) for mum: ponte from the Textile Centre (still available to buy). Cut size 10 all round and sewed on sewing machine. Fit was perfect, and my mum loves it. How amazing does she look!

Seamwork Paxson

Seamwork Paxson for dad: sapphire blue sweatshirt fleece for sleeves, cloque quilted jersey (from the Textile Centre) for body, and navy ribbing from stash for cuffs, neck, and waistband. Cut size L all round. Fit is a tad too small over tum (although the pic below is immediately post huge chrimbo dinner!).
Started off using the Pattydoo Tom, but I fecked up on grading it and the neckline turned out Linden-esque (which would not have suited my dad). I took the whole sweatshirt apart and was able to salvage most of it, only having to cut new sleeves (the old sleeves have now become my Toaster sleeves though...zero waste for the win).

Tried to get a good pic to convey the strange backing of the cloque fabric, maybe all cloque is like this?

The cloque fabric was much thinner than the fleece sweatshirt, and had this horrible scratchy backing on it, so to equalise out the weight of the bodice and sleeves, I lined the bodice with a super soft poly jersey type knit (got it in Value Village in Canada so have no idea what fabric type it actually is, oh how I miss Value Village!).

Want to make a full set of these jammies eventually, lots of new (to me) techniques in this pattern
Check oot the matching tartan rows
Butterick B6296 for sister with gorgeous brushed cotton from Fabworks (now sold out). I had received a sample of it in a previous order as it was Fabric of the Week, and had been struck by the lovely colour combo but I was totally convinced after seeing Amanda at I Sew A Lot's jammy bottoms made from it, ever grateful for the inspiration!

This pattern has yoke and separate cuffs at ankles but I joined the pattern pieces together to make the leg pattern pieces as one continuous piece. This item was a great success...not so much the next one for my brother-in-law which I made as a set of matching bottoms from the same fabric as for my sis (the colours are just unisex enough I think).

I had a male jammies pattern in my stash but as it's vintage it was only in one size. Going by the basic measurements I took of my brother-in-law, I thought the fit might be just about okay. It also included a fly front and this was my first time doing this and using poppers and making any kind of trousers.

The fly is a bit funky and one popper is concealed, while the other is not. Not my best work!

See the trouser leg piece! Front and back all in one pattern piece.

The leg pattern piece doesn't have a front and back but instead is one piece, this means that there is no seam on the outer leg,  only on the inner, and the seam is sewn from the bottom of the inner ankle all the way round the Cape of Good Hope and down again to the other ankle.  I had a bit of jiggery pokery with the fly front and I used some vintage poppers from another Value Village bargain buy. In the end, my brother-in-law, although very touched at getting a handmade item for chrimbo, said he would have been happy with the same jammy bottoms I made for my sis! I had a great debate about fly fronts on jogging and jammy bottoms with my female friends at work...and I wish I had just omitted the fly as it seems that men are not bothered about that anymore. I'm so out of touch!

I was really pleased with the matching on both sets of jammy bottoms though, within themselves and standing next to each other, not a line out of sync. That was purely and utterly beginners luck though as I hadn't paid that much attention to print placement when cutting.
My first Hemlock tee

I was sewing right up till 11pm on christmas eve to get all the pressies finished (even though I had had two weeks of hols within the month leading up to christmas...Woman, procrastination is thy name). I was working all the way through the festive holiday period but did spend new year's day sewing and made my first Hemlock. What is oversized and slouchy for most others, is not so for me. In fact it's a perfect fit and I love it for that. The Hemlock, as most folk know is a free pattern from Grainline Studio, and is one-sized. I made this with a drapey viscose jersey, 2m of which I had got for a fiver in a Remnant Kings sale last year. I've been wearing my top to work several times a week, and want to make lots more viscose jersey versions as it's so easy and comfortable to wear for me.

Never mind the Cavern, this is my new favourite haunt in Liddy!
The first weekend of January I was in Liverpool for my friend's annual birthday trip to a favourite city of us both. Abakhan was having their Fill A Bag sale but I was due to arrive 2 hours before it finished. I did get to the shop with an hour to go but I was up to high-doh and it was so busy that I didn't buy anything in the Fill A Bag section (you could get a bag for a fiver or a tenner) and instead spent 30 quid downstairs in the remnants section (which is my favourite bit anyway).  I got mostly woven viscose for spring and summer, some jersey, and I stocked up on power mesh and ribbing as they were mega cheap.

Even if the pic doesn't show it, the dye had run all over it!
My best buy was this stripey viscose jersey, and I was heartbroken when after washing it the dye had run! And eejit that I am, I hadn't noticed it till it had already been sitting on the radiator for two days, so as far as I knew it was well and truly heat set by that point. After some research online I found this product (and it had better reviews than other stain cleaning products) and hunted it down (only Morrisons sell it local to me).

It didn't do the job....however, I had read (and the box instructions said same) that sometimes it took a second application. This time it did work and I am truly amazed to see no trace of the dye left! I can definitely recommend this to anyone who comes up against a similar situation, boxes are 2 quid and you get two sachets inside (both are used in a single application).

When I was in Liverpool I also found this brilliant product in Home Bargains (while looking for the cheap booze section), for only 3 quid. I've no need for it right now, but think it's a great investment when similar branded products (eg Prym and Hemline) are as much as 5 times the price! Worth finding your nearest Home Bargains shop for!

In the past two weeks, I've made toiles of the Toaster 2 and the Tessuti Mandy Boat Tee, both unfinished as I'm not happy enough with how they have turned out. I over-zealously adjusted the neckline of the Mandy and can now barely get it over my head. This is another free pattern and one-size only. It's extreme bagginess is not going to work for my personal taste, but I did like the pattern's construction of the boat neckline so might try to adjust the Hemlock instead. The Toaster 2 I made in a lovely plummy purple ponte but I was too vain to cut a larger size so it's a little tight across the back to the point where the mock turtle neck is strangling me! As I've lost a few pounds since I made it, it's getting a bit looser and less strangly. But I also wonder if the armscye is too high for me as it feels very tight there. I like the idea of this top though, so hope to work on the fit a bit more.

What a boring, long blog post. 98% for my own benefit anyway. I'm overdue on making my mum's birthday present, and also some cushion covers for a friend, so those projects are next on my list, though I would like to squeeze in some Hemlocks for much needed work-wear. I've a weekend in Brighton coming up and looking forward to exploring/dragging my big cousin round sewing establishments there....I may even be able to squeeze in some time in London and am swithering about going to Goldhawk Road....and buying the inevitable hold baggage allowance I'll need for the flight home!


That's all for now!


Tuesday 6 December 2016

A week of firsts: Sew Scottish meet-up and a Grainline Linden

Pic courtesy of Lesley. Top, L-R: Ellie, Lesley, Caroline, Liz, Helen, Judith. Bottom L-R: me, Emma, Franca, Jens, Elaine, Carol
It's been just over a week since the Sew Scottish meet-up and not only was it a fun friendly day, but I found my first experience of a meet-up to be really informative and inspiring and have continued to feel the creative aftershocks long after the day itself! More on that later, but first a re-cap of our wee day out. (and scroll WAY down for my first ever Grainline Linden sweatshirt!)

Here's a list of the attendees, and there were many more who couldn't make it on the day who I certainly hope to meet at the next meet-up. In the meantime, please check out the blogs or instagram feeds for those pictured above:
Ellie of An Original by Ellie
Lesley of Sew Sleep Deprived who as co-organiser has written her own excellent account of the meet-up here (great pics too!)
Caroline of La Robe A Caro
Liz of Mrs Whiskerson Knits
Helen of Grosgrain Green
Judith who is on Instagram here
Emma of Sew Do It Emma
Franca of Oranges And Apples
Jens of Hummingbird Sews
Elaine of Elaine O'Connor
Carol who is on Instagram here

Only two of us travelled on the train from Glasgow, myself and the lovely Carol, who had on probably my most favourite garment of the day, a Talvikki sweater from Named Patterns. Actually, it wasn't just me who was impressed, she got lots of compliments and rightly so! (check out the Talvikki on her Instagram feed here)

Carol and I had a right good chinwag on the journey east, and even did a bit of sneaky early-bird fabric and pattern swapping....oops! :) We then picked up Helen and Jens as we left Waverley and thankfully Helen, being a local, took us straight to the cafe where the rest of the gals were waiting. Our motley crew numbered an even Durty Dozen once Elaine (the only girl who I'd met before) joined us at our next stop which was the National Museum of Scotland. Unless I am blocking out a memory, I don't think I've ever actually been here! The shame! Our target was the permanent fashion gallery. To be honest, I was enjoying yakking to so many fellow sewers so much that I didn't properly take in the exhibition, though did get a few snaps. I'll just have to go back for another visit sometime. The weird thing is that whenever I visit Edinburgh I feel like I'm in some foreign city abroad. I have absolutely no idea where I am at any given point (unless I'm on the Royal Mile) or how to get anywhere. Thank feck for Google Maps then!
This 1980 Jean Muir matte jersey dress caught my eye. Love the perspex belt buckle detail.

Picture courtesy of National Museums of Scotland website
A special thrill for me to see an Andre Courrèges dress right in front of me!
Caroline gives scale to this supersized pannier court dress from the mid 1700s

We had soon museumed ourselves oot and empty tums were needing attention, so Emma called the restaurant she had very kindly booked and we managed to get our reservation brought forward. Along with Emma, Lesley had co-organised the meet-up (and I believe the visit to the museum was suggested by Helen). The Edinburgh gals did such an excellent job (thank you once again ladies!), I hope the Weegies can do the same back for the next one.
Caroline shows Elaine some of the details of her model designs

Introducing Petite-Moi, Caroline's 1/4 scale dummy

My fantastic haul from the swap - I was so restrained as I could have got a lot more!


I don't know if Emma planned it this way, but we had the whole of the sunken part of the restaurant to ourselves which turned out to be perfect for two reasons: one, we were unable to bore anyone within a 5 yard vicinity with our constant stream of sewing chitter chatter; and two, we had surrounding spare tables and seats to lay out all the fabric and patterns that people had brought to swap. It's always interesting to see what is one woman's trash versus another's treasure. We had all been so generous with our patterns that we dropped about a dozen or so, which were unclaimed, into the charity shop after lunch. There wasn't as much fabric left, so you can tell where our priorities lie then! I came home with 5 fabrics and 5 patterns, and felt like christmas had come early. In fact, I had so overindulged that I didn't buy anything at our final stop of the day, Edinburgh Fabrics. It was funny to see the local gals go straight to their favourite sections, while us fabric tourists took in every inch of the ram-packed shop, moving slowly (as tourists are want to do) and causing bottlenecks while we paused in front of every bolt.


People then dispersed and started to make their way home. It was just me on the train back to Glasgow, but it gave me a chance to digest all I'd learnt over the course of the day. Little did I suspect that I'd still be thinking about it all for the next week!

Lesson one: feel the fear and do it anyway
A conversation I had with Ellie was very enlightening. She made a coat within the first handful of garments she ever made. She had no idea she was supposed to be scared of attempting it, so therefore she wasn't. I loved this attitude, and resolved to make a start on my project of replicating this Boden coat using Simplicity 1197.
The Boden Bridget coat in a fabulous emerald green boucle

Lesson two: sometimes life is just too short to trace
I don't think this was borne out of any specific conversation, but my overall increased confidence and energy post the meet-up resulted in me doing a very rare thing (perhaps even for the first time) of cutting straight into a pattern (it was Simplicity 1197). I don't even cut into PDFs, so this was a real change for me (I can now reveal it's not been a permanent change though - yes, I am back to tracing again!).

Lesson three: if you can see it, you can sew it (part one)
During our lunchtime chatter I specifically asked the question about ideas or tips for displaying project plans, and Lesley said she had seen people using bulldog clips to hang up patterns and swatches. I loved this, and though I ultimately want to put a pegboard up to do it, I've made quite a nice stop gap by using adhesive plastic hooks (12 for a pound from the pound shop) , some trouser hangers (also from the pound shop), and some pastel coloured clips from ebay. I've been able to hang up some blue string lights that I got from Primark earlier this year. Only thing is, I thought I had placed the hooks high enough to be out of the reach of naughty cats...apparently I am just a stupid human who thinks she can outsmart cats. Like I said, stupid human.
It doesn't look like much yet...but a vast improvement on the blank white wall it's been for 12 months
Pepsi chooses her favourite from my newly arrived Fabworks samples


Lesson four: if you can see it, you can sew it (part two)
A fascinating lady in particular is Caroline, with the most wonderful french accent, a fellow one-time Canadian resident, and god-like creator of Petite-Moi, a quarter scale model on which she perfects her garment-making. I unfortunately couldn't quite hear everything she was saying about Petite-Moi during lunch, but she brought along a mini sized portfolio, complete with drawings and pattern designs, and of course Petite Moi made an appearance in the flesh! Caroline studied with a fashion designer who lives in her town, and she suggested that maybe we can have a day trip there sometime and a visit with the designer/now teacher. We will hold you to that Caroline! After having met Petite Moi and subsequently seeing some of the croquis that Emma and Ellie have posted on their Instagram pages, I used this idea to mock up a mini Linden....which brings me finally on to the Linden!
A very rudimentary attempt at a fabric sample croquis - but enough to see that the combinations would work

Lesson five: come on in, the water's lovely
Wherein, after stubbornly refusing to succumb to the lure of the Grainline Linden pattern for the longest time, I take advantage of a Black Friday discount and purchase it, and today, finished my first version.
The Linden Sweatshirt from Grainline Studio

I had been wanting to make some raglan tops for ages, and did hum and haw about buying the Grainline pattern, having also considered the Hey June Raglan or Simplicity 1317 (which I saw on the wonderful Saturday Night Stitch's blog). But I knew I had a pattern for a raglan somewhere in my current collection, and true enough found this vintage Kwik Sew 1230. I made a toile of it over a month ago but wasn't happy with the look (the piece for the neckband was so short that I had to completely stretch the ribbing to the full when sewing up, which resulted in it springing back once sewn and just looks like it is too small, though doesn't feel it; the sleeves and the area round the ochsters were awfy roomy too. In general I just didn't like the cut of this 80s pattern), and knowing the Linden is much more of a modern fit....Reader, I jumped on board the Linden love train. I've seen so many wonderful versions out in the instagram and blogging wilderness, and then Jens sported a fab quilted one at the meetup, so edge duly tipped over!
Vintage Kwik Sew 1230 from 1983 - Olivia Newton John, eat yer heart out love!
Toile of Kwik Sew 1230. Sleeves are too long and baggy and I made a real kack-handed job of the V-Insert, as I simply could not fathom the instructions or work out how to do it. The fabric is from Canada and poly waffle knit.

Not only had I swithered about buying the Linden, but I have also spent weeks, which have become months, thinking about possible fabric combos (and of course, some of those combos necessitated more fabric purchases...of course they did!). I've recently noticed many makes posted on Instagram using fabric from the Fabworks shop, which amongst other fabric types, have a great selection of knits. Up till now, when fabric shopping, I've really confined myself to £5 and under per metre, but I bent my rule for this mustard looped back (aka french terry) sweatshirt (which is organic too, but I find that I don't really care about that) purely because I haven't seen mustard anywhere else. At £7 a metre, this was a luxury buy as I don't pop my cork for just any fabric, and certainly not from an unknown (to me) shop. I also ordered some samples of other colours, for future colour blocking plans. Postage at first seemed steep at £5 (I'm used to paying much less on ebay), but was guaranteed next day delivery and is a flat cost, no matter the weight of the package (which sweatshirting is bound to make on the heavy side). It didn't arrive the next day, but no matter, it came the day after that.

The mustard is less bright than I had initially hoped for, but it's more than fine (and is sadly sold out now!). The quality is very impressive however. I did not have a smooth ride with sewing up the Linden but everytime I touched the mustard fabric, it was so comforting and soft and giving, it seemed to be telling me that everything was going to be okay. If this fabric was a John Lennon song, it would be Hold On from the Plastic Ono Band album (in fact, I've been singing this song in my head all day).

Things got off to a good start. I had done lots of research and noticed that many people say they could have chosen a smaller size, after having sewn up the Linden according to their size on the pattern booklet. With measurements of 36" full bust/32" waist/42" hips, I chose a size 6 and graded out to a 12 at the hips. I also placed my pattern pieces from my Kwik Sew on top of my Linden pieces to check that the bodice and hips would fit, and that the sleeves on the Linden size 6 wouldn't be too tight (I also used the sleeve pattern piece from my Pattydoo Ella top, to check length).
I chose a size 6, graded to 12 at the hips, and sewed up View A with self neckband and hemband, and no cuffs

There aren't much in the way of instructions in the Linden pattern booklet. For example, I wish it had recommended stay-stitching the neckline (after all, the pattern isn't only for stable knits, it recommends jersey too). This is part of the Tilly and the Buttons Coco instructions, and I have used it on other knit projects, but of course because I didn't see it mentioned in the Linden instructions, I omitted to do this on what turned out be the most stretchy of french terry fabrics that must exist on this planet! I bought a wonderful bicycle print french terry from one of my favourite ebay sellers, The Textile Centre, for a bargain £4 a metre earlier this year. The description on the listing is quite interesting :
Mid-weight jersey with a vintage bike print suitable for work out wear and pyjamas.

 This fabric is relatively new and huge on the continent,It is not your usual track suit or hoodie material,

Very soft to the touch with a slight crepe feel on the back, 

I don't see the crepe comparison in real life - it is a looped back sweatshirt fabric to me, but then what do I know! It's very very stretchy, with not a lot of body, and I knew all this, and knew I could have stay-stitched but I bloody didn't.

The sleeves and bodice went together really quickly (which is the good thing about a raglan sleeve, so much easier to sew up) and I cut a size 12 in the hem band (from the mustard fabric, as I didn't have any ribbing - what is it with the price and availability of ribbing by the way??) and attached it to the bodice. However, there is not much stretch in the mustard sweatshirting and try as I might to stretch it to its full capacity while sewing the hem band on, I still came up short when I got to the end (the bodice side seam). I rectified this by sewing a new side seam, bringing in the seam allowance by a few cms; not enough to affect the fit across my hips, and at least the hem band then made it all the way round.

Having spent a total of 6 hours non-stop (commencing with printing out the PDF pages) I was tired and hungry;  two things which are anathema to me and sewing! So I hung up Miss Linden on my mannequin so I could look at the pretty, all the while making a Pretty Woman style huge mistake.

Check that stretched oot neckline, arrrrghhh!

Getting up the next day the neckline looked even wider than the night before, and when I tried it on it was giving me (unintended) Flashdance realness. I had seen someone comment on their version of the Linden with the very same issue, and now I really got the fear (you know when you think a make is completely fecked beyond redemption?).  I knew the neckband pattern piece wouldn't have a hope in hell of reaching all the way round my gigantic stretched out neckline, so I measured the circumference to see what I was dealing with. 72cm didn't seem good. I also didn't like the narrowness of the neckband pattern piece, and having seen it on numerous other people's Linden's I had already decided I wanted it thicker (I do think a narrower neckband looks proportionate on jersey versions of the Linden, but it never seems to look wide enough on sweatshirt versions - but that's just my personal preference). I used my Kwik Sew neckband pattern piece for the width and drew a 36cm by 7cm rectangle on my pattern paper (another new thing I've tried this week is using Baking paper instead of my usual Burda tracing paper) and cut this out on the fold. Because I had had to stretch my hemband out as much as possible to accommodate the real width of the bodice, it has resulted in a wee bit of a blouson effect, so I tried to avoid the neck looking gathered by not stretching the neckband at all, but just sewing it straight on. Of course, this came out looking disastrous. Cue one very lame looking, sticky-up-sitting neckline. As you can see from the pic below, I was not amused.
From Flashdance to Star Trek realness!

I unpicked it and decided to then try stretching the neckband this time (as the pattern instructions do direct you to do, to be fair), but not to its full capacity, just about halfway to its capacity, and took off about an inch and a half of the neckband where it met at the back. This time when I tried the garment back on, I was much more pleased with the result. The neckline is still a lot wider than I want - I suffer from drafty neck syndrome and felt it keenly when test driving my new sweatshirt out in the minus 1 afternoon weather today, even with a scarf on. It also doesn't sit well under a coat. It gapes terribly at the front, and I had to pull the back of my sweatshirt down, while putting on my coat just to get the front looking nice and flat across my clavicles. However.....I have a Linden (at last), the fit is overall fairly good on first try, and I love my final choice of fabric combo. I wonder how less wide the neckline would be if I were to use a stable fabric for the whole garment, or use proper ribbing for the neckline, or whether I might just re-draw the neckline (at least for winter versions, I think the looser neck will be quite nice for spring and summer styles). Oh, and although I've seen lots of people comment on the extraneous length of the sleeves, mine are just perfect on me (which leads me to think I must be part orangutan in the arms department as I am a 5'2" shortarse!). I didn't want a cuff, after all was said and done, so I just turned up the sleeve ends by 2cm, and twin needle stitched at 1.5cm. I haven't stitched round the neckline to anchor the seam allowance down as I prefer the look without the extra stitching line. I used my sewing machine throughout (still need to sort out my serger issue).
Neckline still pretty wide but I'm definitely pleased with the general finished product


I think I didn't cut my left sleeve on the grain, which may (or may not?) explain the pulling here
Will mostly be wearing my hair down when I have my sweatshirt on, so the wide neckline won't really be so evident

I put the popularity of the Linden down to the likeability and versatility factors of a raglan sleeved knit top. People can really get creative with fabric types, and combos for the neckbands, hembands, cuffs, and sleeves. The Grainline Studio brand is all about wearable basics, and while I am okay with having this pattern in my collection, I don't think I'll be shelling out for any more from them (although I do already have the Archer shirt).


Talvikki from Named Patterns

Geodesic pullover from Blueprints for Sewing
I am excited to try the Sew House Seven Toaster Sweaters both versions 1 and 2 and the Talvikki at some point, and recently came across what I think is a fantastic and original design for a sweatshirt: the Blueprints For Sewing Geodesic pullover. It seems to not have made much of a dent in the sewing world yet (from what I can see) but I hope it does, because it's at least trying to do something different! (I'm also quite fond of anything Geodesic, due to this famous one in Paul McCartney's garden).
From the legendary Mad Day Out photo session which ended at Paul's house in Cavendish Ave

I think that's quite enough for one blog post! I don't expect anyone to still be reading by now! My coatmaking project, while still high on my list, will be taking a deserved back seat to some christmas gift projects...and time is already running out on those. Have a wonderful and festive time everyone!